If you need to make the Teams Add-On functionality available to all your Teams, proceed with the Tenant App Catalog Installation; if you want to restrict usage to a subset of your Teams, proceed with the Site Collection App Catalog Installation.
Install Web Parts on Tenant App Catalog
To add our Teams Add-on, you'll have to upload the Web Part package to the Tenant App Catalog. To do this, follow the steps below:
-
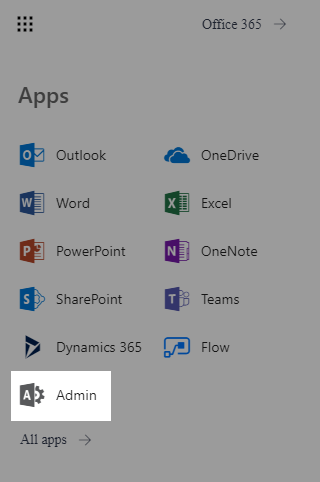
Open the Office 365 app launcher and click on Admin;
-
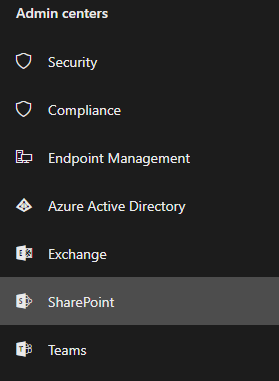
Open your SharePoint Admin Center;
-
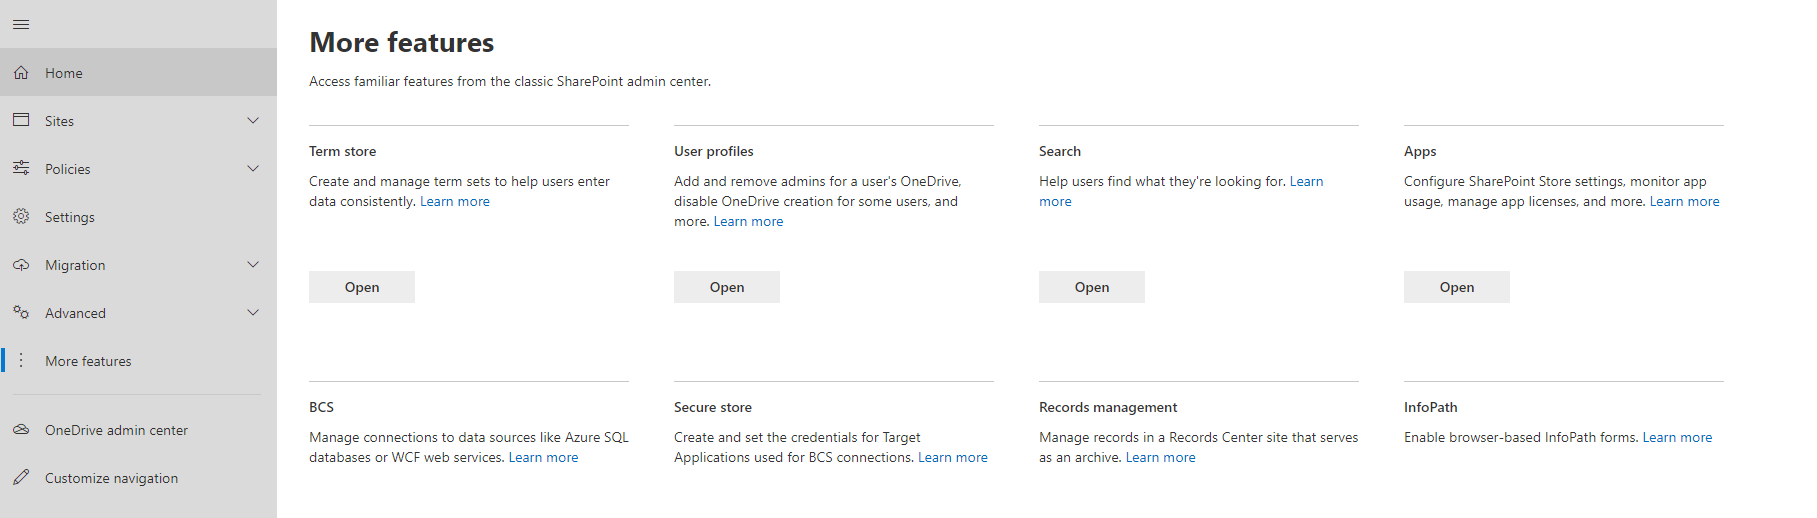
On the left panel, click on More features and select Apps;
-
Proceed by clicking on App Catalog;
-
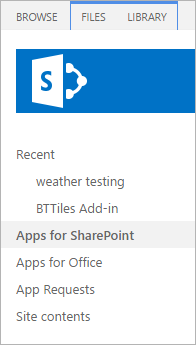
On the left pane, click on Apps for SharePoint;
-
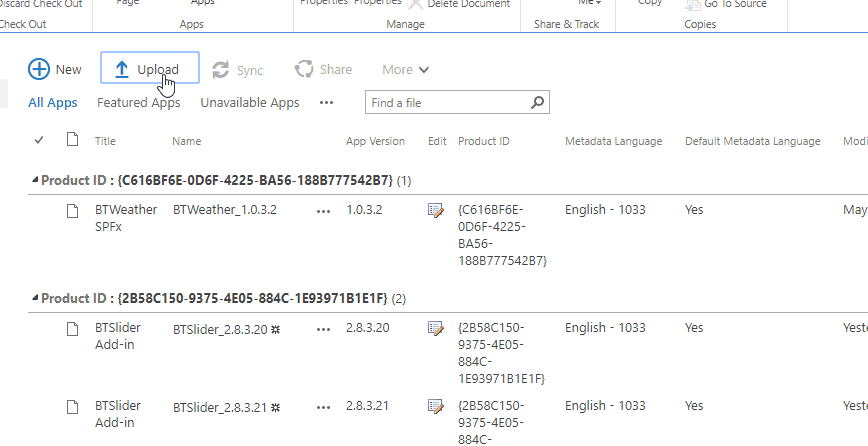
Now click on Upload and select the .sppkg file that's inside the spfx folder in your web part package.
-
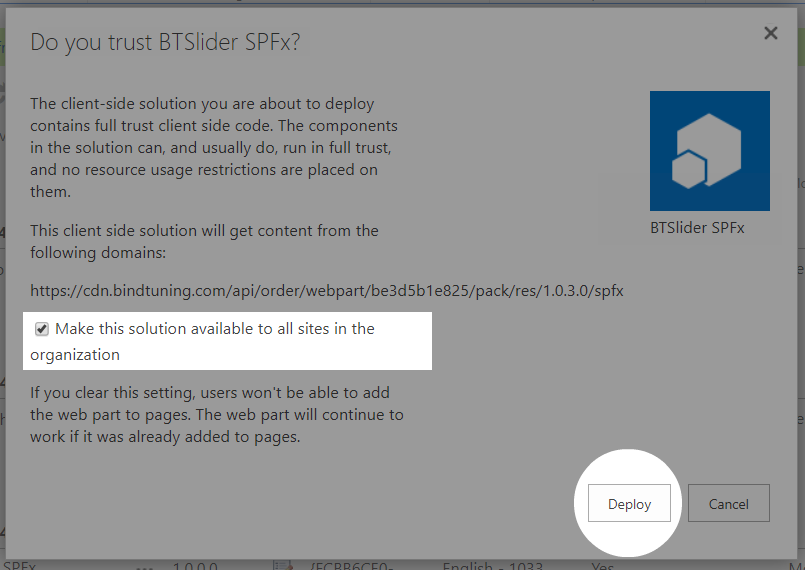
Finally, on the pop up that appears, tick the checkbox Make this solution available to all sites in the organization and click Deploy;
Install Web Parts on Site Collection App Catalog
To add our Teams Add-on, you'll have to upload the Web Part package to the Site Collection App Catalog. To do this, follow the steps below:
-
Open the Site Collection you wish to deploy the product to;
-
Click on Settings and navigate to your Site Contents;
-
Open your Apps for SharePoint list;
Note: If you're unable to see the Apps for SharePoint list, this means that you do not have a Site Collection App Catalog created. To do so, follow the steps described in the following article.
-
On the left pane, click on Apps for SharePoint;
-
Now click on Upload and select the .sppkg file that's inside the spfx folder in your web part package.
-
Finally, on the pop up that appears, tick the checkbox Make this solution available to all sites in the organization and click Deploy;